Blog
How to Make VR Video a Beginner's End-to-End Guide
Published June 22, 2026
You've probably watched a few 360 videos, looked up a couple of cameras, and realized most advice falls into two bad camps. One side says you need a professional VR rig and a post team. The other says you can just press record on a consumer camera and call it immersive storytelling.
The truth sits in the middle. If you want to learn how to make VR video, your first job isn't buying the fanciest gear. It's making good decisions in the right order. VR punishes sloppy planning harder than flat video does, but it also rewards thoughtful, simple setups. A stable camera, a clean location, patient pacing, and a solid export workflow will get you much farther than an expensive rig used badly.
There's also a practical reason this format matters more now. The broader consumer VR market is growing, with Statista projecting VR revenue from less than $16 billion in 2024 to more than $18 billion by the end of 2025 in major markets, which helps explain why VR-ready video workflows are becoming more commercially relevant (Statista's VR market outlook). For a creator or small business, that means this is no longer just a novelty format. It's a distribution format worth learning properly.
Table of Contents
- Planning Your First VR Video Project
- Choosing the Right VR Camera and Gear
- Mastering VR Capture and On-Set Techniques
- The Post-Production Workflow for Stitching and Syncing
- Editing Color Grading and Exporting Your VR Video
- Troubleshooting Common VR Video Problems
Planning Your First VR Video Project
A first VR shoot feels complicated until you reduce it to a simple production model. The process parallels building a house: Pre-production is the blueprint, production is the construction, and post-production is the finishing work. That structure holds up because a practical VR workflow is usually split into those three stages, with the biggest risk points happening in planning, capture, and finishing rather than in recording alone, as outlined in VideoStudioPro's VR workflow guide.
Think in three stages, not gear shopping
Most beginners start with camera research. That's backwards. Start with the experience you want the viewer to have.
Ask three questions first:
- Where is the viewer standing? In VR, camera position is the audience position.
- Why does the viewer want to look around? A room tour, a behind-the-scenes walkthrough, and a guided product experience each invite different kinds of exploration.
- What happens before, around, and behind the viewer? In flat video, you can ignore what's off frame. In VR, there is no off frame.
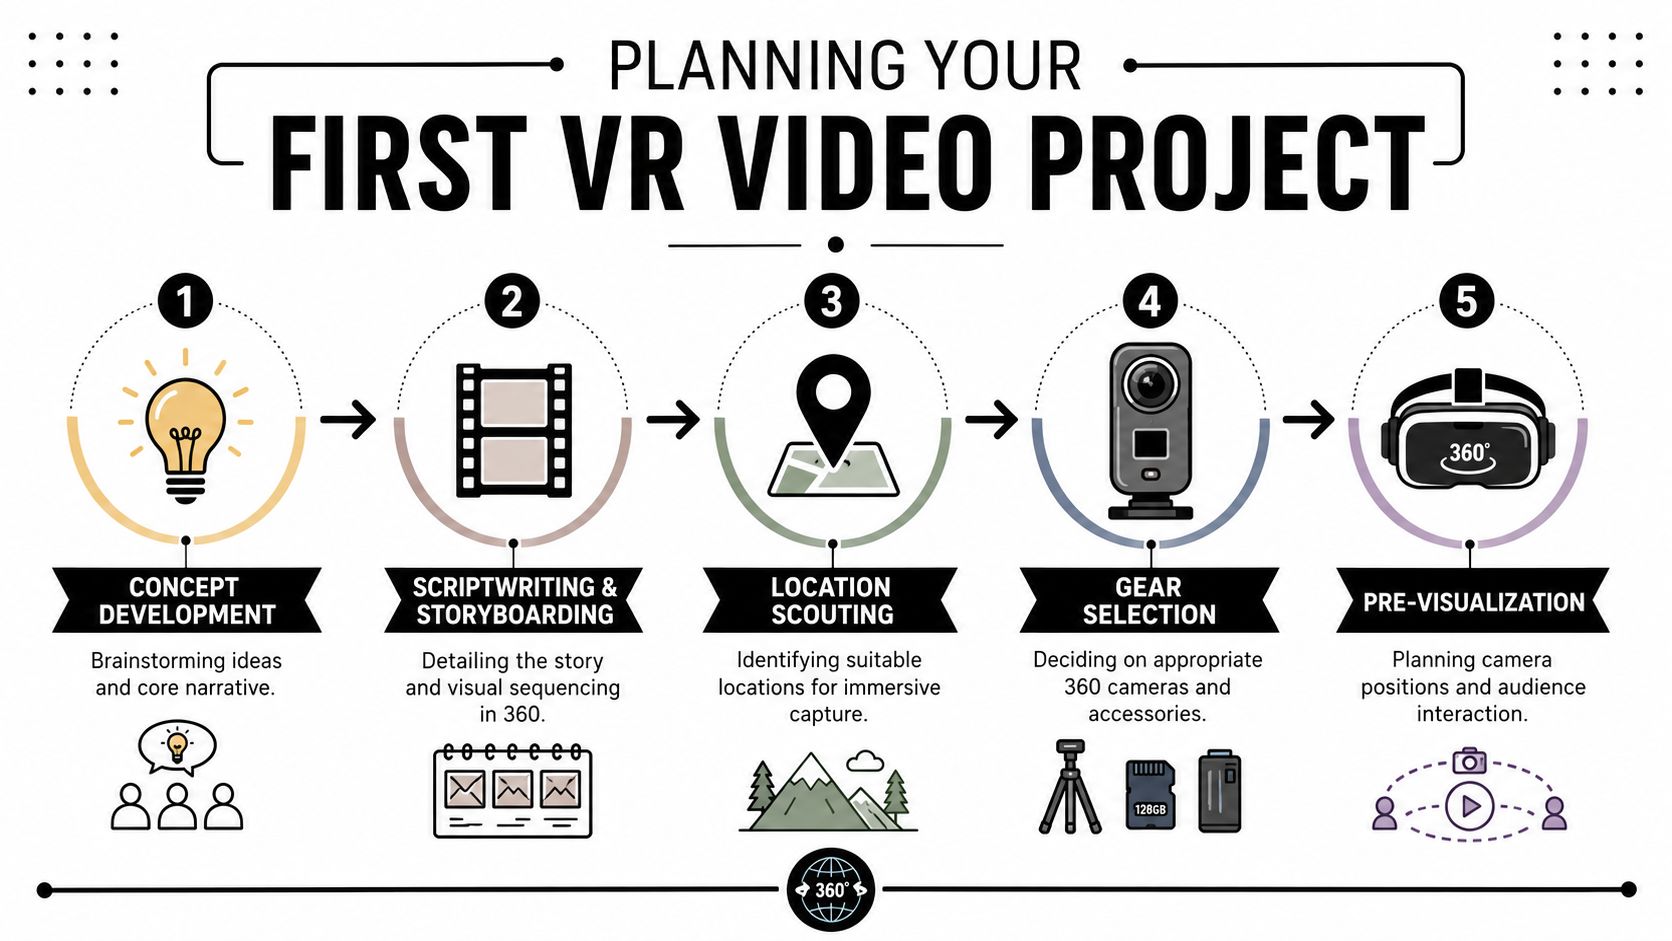
A clean beginner workflow usually looks like this:
- Pre-production: Define the concept, script key beats, scout the location, and decide where the camera will live in each scene.
- Production: Record the environment with a 360 camera and capture clean takes with enough time for the viewer to orient.
- Post-production: Organize media, stitch and edit scenes, then publish for headset playback.
If you already create short-form or YouTube content, it helps to think of VR as a different audience experience layer, not a totally separate creative career. The same planning habits that help with thumbnails, hooks, and viewer flow in flat content still matter, just in a different form. This is also why creators who care about packaging often benefit from studying adjacent publishing details like YouTube thumbnail sizing best practices, even when the final VR asset lives on a headset-friendly platform.
Script for attention, not framing
A normal storyboard assumes you control the frame. In VR, you don't. That means your script should focus less on shot composition and more on attention design.
Write down:
- The main point of interest in each moment
- How the viewer notices it, such as movement, sound, or timing
- How long the viewer needs to understand the space before the next event
Practical rule: If an important action starts instantly after the scene begins, many viewers will miss it because they're still orienting themselves.
Scout locations like a VR producer
A pretty location can still be a bad VR location. You need to check for practical problems that become obvious once the viewer can look everywhere.
Use this quick location filter:
| Check | Why it matters in VR |
|---|---|
| Even lighting | You can't easily hide lights outside frame |
| Clean floor area | The camera often sits where people can walk into shot |
| Ambient noise | Audio cues are part of navigation |
| Depth around camera | Nearby objects can feel awkward or distorted |
| Crew hiding spots | You and the crew need somewhere to disappear |
The strongest beginner projects are usually simple. One room. One experience. One clear reason to look around. That's enough.
Choosing the Right VR Camera and Gear
Effective gear choices prioritize a workflow you can control from setup to export. For a first VR project, the best camera is usually the one you can place quickly, monitor with confidence, and finish in post without turning a simple shoot into a technical rescue job.
Beginners often overspend on capture and underspend on everything that keeps a project usable. In practice, support gear, audio, power management, and post compatibility decide whether the final video feels polished.
Monoscopic or stereoscopic
Start with the format, because that decision affects every budget and workflow choice after it.
Monoscopic 360 video is the practical default for first projects. It is easier to shoot, easier to stitch, lighter to edit, and more forgiving when your location, lighting, and pacing are still improving.
Stereoscopic VR video can create a stronger sense of depth in a headset, but the margin for error gets smaller fast. Stitching is less forgiving. Camera placement matters more. Delivery specs are tighter. Bitmovin's guidance for Meta Quest playback reflects that higher standard, especially for stereo masters and compression settings (Bitmovin's VR and 360 encoding guidance for Meta Quest).
The beginner decision is usually straightforward:
- Choose monoscopic for test projects, branded walkthroughs, simple educational content, and solo production.
- Choose stereoscopic if headset immersion is the core product and you already have time set aside for a stricter post workflow.
- Skip stereo for now if you are still learning how to stage action and guide attention in 360. Weak stereo is harder to watch than clean mono.
I usually tell first-time creators to spend their effort on story clarity and clean execution before adding technical complexity. That advice applies even more if the project is brand-led or promotional. Many teams making their first immersive piece get better results by borrowing techniques from UGC-style video production workflows, where speed, clarity, and believable presence matter more than maxing out every spec.
Consumer camera or pro rig
Camera choice is really a workflow choice.
A consumer 360 camera is often the smartest place to start. The image quality ceiling is lower, but setup is fast, stitching is simpler, and there are fewer ways to break the shoot. That matters a lot when you are learning placement, blocking, and how long a VR scene needs to breathe.
A prosumer 360 camera usually gives the best balance for paid work. You get better image quality and more control, but you still keep the process manageable.
A professional multi-camera rig makes sense for premium productions with crew support and a clear business reason for the extra complexity. It also brings more sync issues, more storage, more setup time, and more opportunities for stitching artifacts.
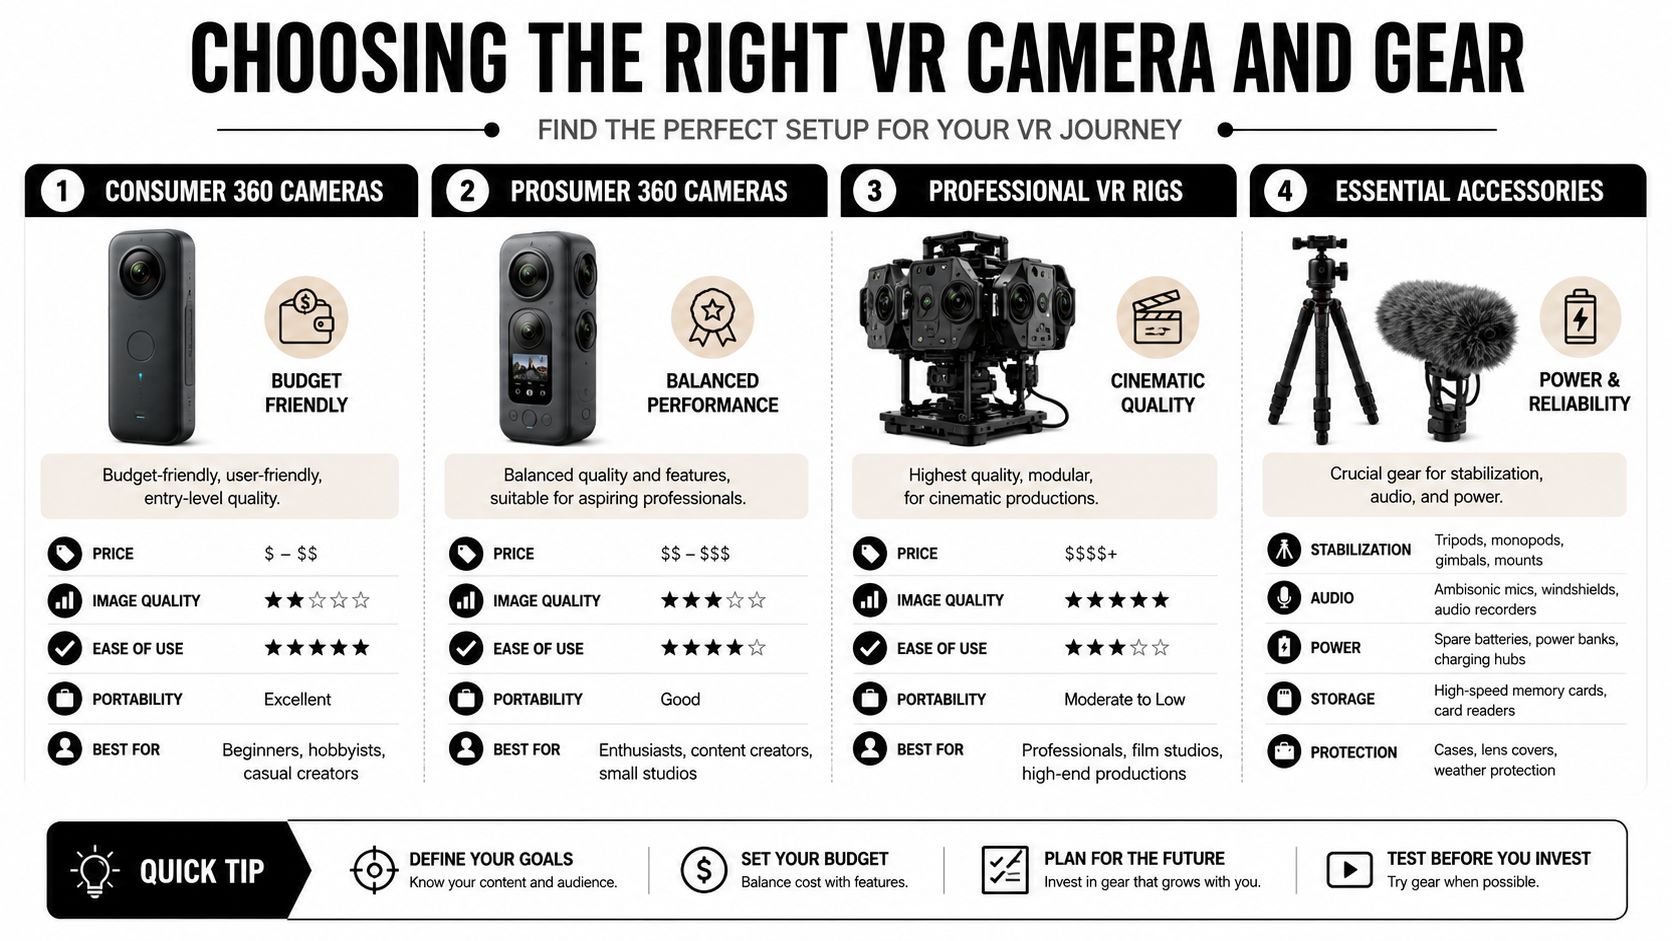
A quick comparison:
| Setup type | Best for | Strength | Limitation |
|---|---|---|---|
| Consumer 360 camera | First projects, solo creators | Fast setup, easy stitching | Less control in difficult scenes |
| Prosumer 360 camera | Client work, branded tours | Better image quality and workflow balance | More post work |
| Professional multi-camera rig | Premium VR productions | Highest capture flexibility | Expensive, slower, harder to manage |
If you want to see how creators think through those trade-offs in practice, this breakdown is worth watching:
The gear that matters more than beginners expect
The camera gets the attention. The support kit protects the result.
Prioritize these items first:
- A stable monopod or tripod: Small vibrations feel much worse in VR because the viewer experiences the whole environment moving.
- Simple, dependable audio capture: Sound cues help direct attention and sell presence. Weak audio makes even sharp footage feel cheap.
- Extra batteries and organized media handling: VR reshoots are awkward, especially once talent, lighting conditions, or foot traffic change.
- A remote preview or control method: Touching the camera after placement wastes takes and can create stitch problems.
- A crew hiding strategy: The camera sees everything, so plan where people go before you roll.
One more budget rule helps. Buy gear that removes failure points before you buy gear that adds options. A modest camera on a stable support with clean audio will beat an advanced rig that slows down the shoot and creates more post problems than the project can afford.
Mastering VR Capture and On-Set Techniques
Let's apply the planning to a real beginner project: filming a virtual workshop tour for a maker brand. The goal is not fancy camera movement. The goal is presence. The viewer should feel like they walked into the room at the right moment and know where to look without being pushed around.
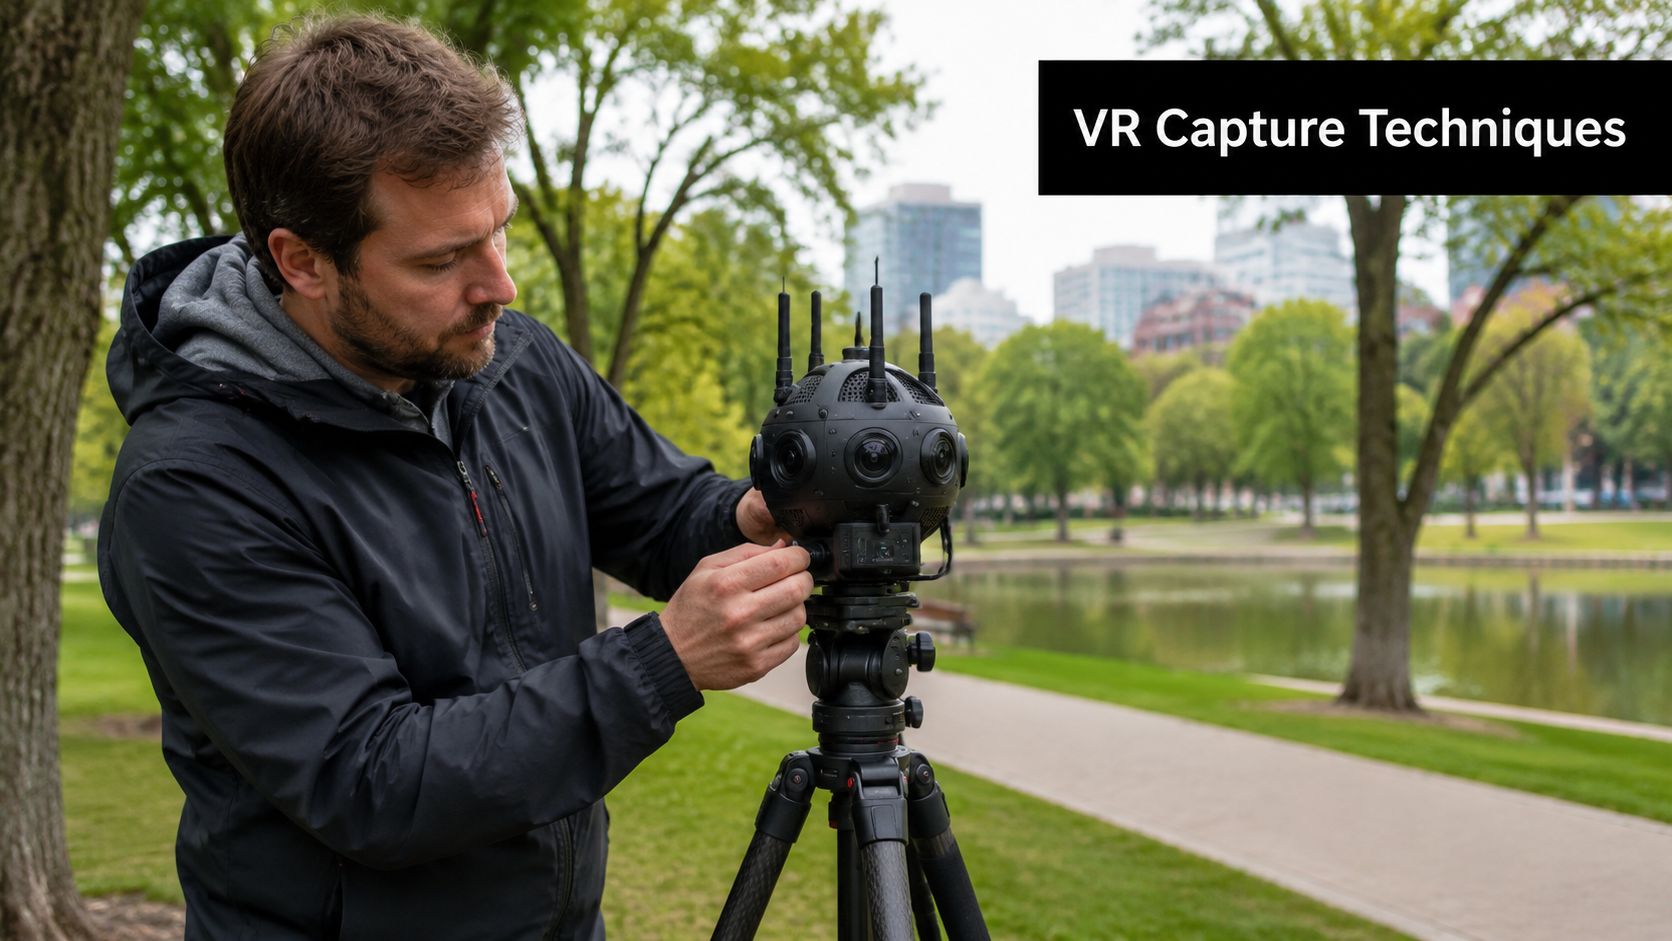
A simple workshop tour example
Start with camera position. Put it where a visitor would naturally stand, not where a traditional videographer would hunt for the strongest composition. In a workshop, that usually means near the main bench or demo area, with enough distance that the subject can move comfortably without crowding the lenses.
That choice solves several problems at once. The perspective feels human, the action reads from multiple directions, and the footage is easier to watch in a headset.
This is the shift beginners need to make early.
A frame-first shooter asks where the best angle is. A VR shooter asks whether the whole space still works when the viewer turns left, right, or behind. That is why simple blocking usually beats ambitious coverage. One clear action zone in front, one secondary area to the side, and a background with a little life will hold attention better than trying to fill every part of the sphere.
What works on set and what breaks immersion
The fastest way to make VR footage feel cheap is to treat it like handheld social video. Small mistakes feel bigger when the viewer controls the view.
Use these habits on set:
- Keep the horizon level: A slight tilt can feel surprisingly uncomfortable in a headset and takes attention away from the scene.
- Let shots breathe: Viewers need a moment to orient themselves before dialogue, instruction, or product action starts.
- Keep movement motivated: If the camera moves, the movement needs a clear reason inside the story. Otherwise, a locked-off shot is usually the better budget choice.
- Block people by distance: Give subjects room from the camera so faces, hands, and tools do not stretch awkwardly near the lenses.
- Hide the crew before rolling: The camera sees everything, so hiding is a production task, not an afterthought.
What usually causes trouble:
- Fast motion: Quick pushes, whip-like turns, and unnecessary walking shots often create discomfort.
- Action too close to the camera: It can look distorted and draw attention to lens seams.
- Important moments happening everywhere at once: The viewer misses the key beat because nothing tells them where to look.
- Cuts with no orientation time: The audience spends the first seconds recovering instead of engaging.
I usually tell beginners to spend money on retakes before they spend money on more gear. If the blocking is clear, the camera is level, and the sound guides attention, a modest setup can produce work that feels far more expensive than it was.
A useful reference point is social-first realism. The natural, observational quality that works in creator content can also work in VR, but it needs more control. Studying how creators build believable UGC scenes helps here, especially if you adapt that authenticity to a 360 space instead of copying loose handheld habits.
Directing attention without a frame
VR directing is mostly cue management. You are not choosing a crop. You are setting up reasons for the viewer to turn.
Use this order:
- Sound cue first
- Movement second
- Dialogue or explanation third
If a tool starts up on the right, many viewers will turn before the maker speaks. If a helper crosses in the background a second later, that movement can guide attention again without feeling forced. This approach works because it respects how people naturally explore a space.
The trade-off is pacing. Traditional edits can move faster because the frame does the directing. VR needs more patience. Give the audience enough time to arrive, notice, and then follow the action. That extra breathing room is often what separates beginner footage that feels chaotic from beginner footage that feels intentional.
The Post-Production Workflow for Stitching and Syncing
The first time beginners open raw 360 footage, the usual reaction is panic. The image looks bent, the seams are suspect, and clips that felt fine on set suddenly look fragile. That is normal. VR post starts before creative editing because the first job is to build a sphere the viewer can trust.
What stitching actually does
Stitching combines footage from multiple lenses into one equirectangular image. If that merge is clean, the viewer forgets the camera. If it is sloppy, they notice the technology instead of the story.
Consumer cameras have made this easier, but the trade-off is control. Auto-stitching is fast and cheap, which makes it a good choice for a first project. It also misses edge cases, especially when a subject crosses a stitch line or gets too close to the camera. Higher-end tools give you more manual correction, but they also add time and complexity that many beginners do not need yet.
Check four things before you touch the edit:
- Seam visibility
- Subject placement near stitch lines
- Horizon alignment
- Exposure consistency across the sphere
If any one of those breaks, the clip becomes expensive to save later.
Where beginners lose time
Post usually gets blamed for problems that were created on set. In practice, the biggest delays come from footage that was always going to be hard to stitch. A hand passes too close to the lenses. A light stand sits in a spot no patch tool can hide cleanly. The key action lands right where two lens views meet.
A practical stitching workflow looks like this:
- Ingest and label footage by scene, take, and camera position.
- Run the camera software or stitching app and export an equirectangular master.
- Review the full sphere immediately. Spin around, look up, look down, and check the seams before building a timeline.
- Swap out weak takes early instead of trying to repair every problem clip.
I tell new creators to treat stitching review like quality control, not editing. The goal is to decide what is usable, fast. That habit saves hours.
If you already make flat marketing videos, this is the point where the mindset changes. In a standard editor, you can often crop around trouble. In VR, the whole environment is the frame. A simple video maker for photo-and-music storytelling teaches useful sequencing habits, but 360 post demands a full-sphere review process that flat video never asks for.
Sync first, edit second
Audio sync is not a cleanup step. It shapes how you judge every take.
Use the camera audio as your reference track. Bring in the cleaner external recording if you captured one, sync it early, and review the scene with the right sound attached. Beginners often postpone this and start making edit decisions from scratch audio. That usually leads to bad choices because timing, performance, and viewer attention all feel different once the proper sound is in place.
A simple workflow works well:
- Keep the camera audio for sync reference
- Add external dialogue or ambience if it improves clarity
- Sync before trimming and shot selection
- Check whether sound direction matches the action in the scene
Even basic audio choices can improve immersion. If someone speaks from behind the viewer's starting orientation, the sound should support that position rather than feeling glued to the front. You do not need an expensive spatial audio pipeline to get this right. You need consistent perspective and clean sync.
One more review habit matters. Do not judge footage only from the direction you hoped the audience would face. Turn the sphere and inspect the entire space. Beginners who do this early catch more stitch errors, more visible crew, and more distracting background motion before those problems spread through the edit.
Editing Color Grading and Exporting Your VR Video
Editing VR is less about speed and more about comfort. The usual tricks of flat video, aggressive cuts, constant reframing, heavy pacing pressure, don't translate well inside a headset.
Edit for comfort before style
Longer takes usually work better. Softer transitions usually work better. Audio cues often do more than visual edits.
A practical editing checklist:
- Trim dead space, not orientation time: The first few seconds of a scene help the viewer understand where they are.
- Use cuts with intent: Every cut resets spatial understanding.
- Guide attention with sound: It's cleaner than trying to “force” the viewer visually.
- Avoid editing that fights head movement: The viewer is already adding their own motion.
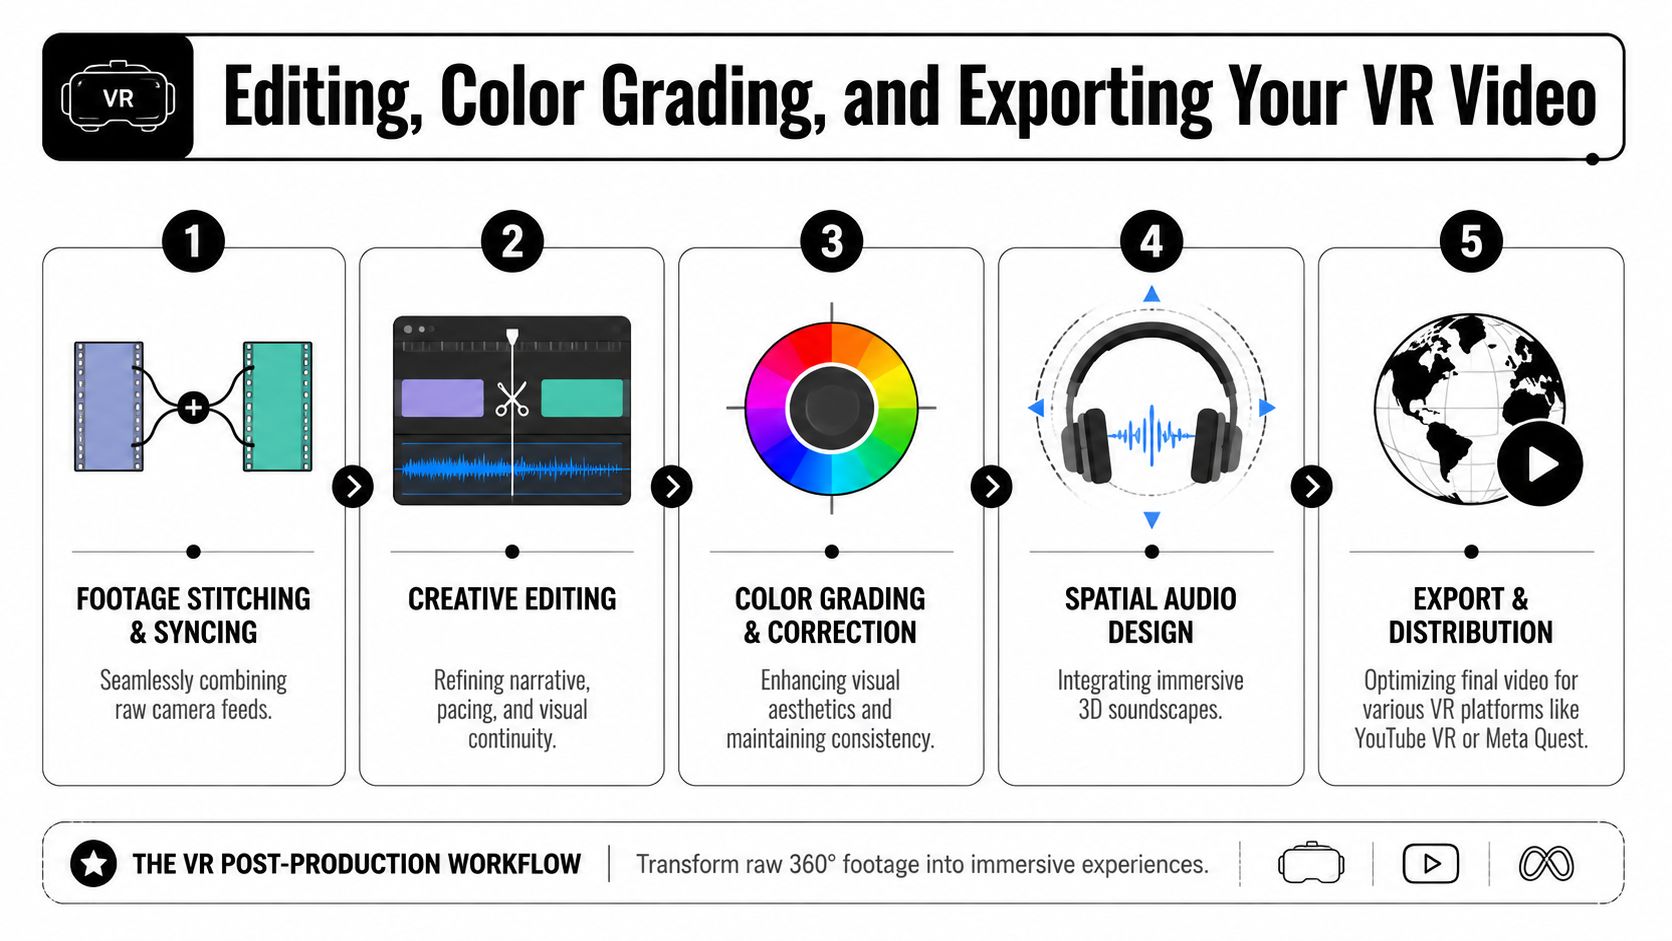
If you also publish ordinary marketing videos, you'll notice the mindset shift. A flat promo often pushes pace hard. VR usually needs room to breathe. That same discipline of sequencing visuals and audio is useful in other workflows too, including tools for building polished social edits like a video maker with photos and music, but headset viewing is much less forgiving when transitions feel rushed.
Color grading for headsets
VR footage needs restraint in grading. What looks punchy on a desktop monitor can feel harsh in a headset.
Focus on:
- Consistency across the full sphere
- Natural skin tones
- Controlled contrast
- Balanced highlights
If one side of the scene is much warmer or darker than another, the viewer will notice the inconsistency when they turn their head. The grade has to hold up in every direction, not just in your default preview angle.
Export settings that prevent common failures
The most frustrating beginner mistake happens at the end. The file exports, uploads, and then plays like a warped flat video because the platform never recognized it as spherical content.
A key post-production step is metadata injection. After rendering, a 360 video file often needs projection metadata added so platforms like YouTube recognize it as spherical content. Without that metadata, the file may play as a flat, distorted video. A tutorial on this workflow recommends exporting at the maximum resolution and notes that H.264 is very good while H.265 is also an option (YouTube tutorial covering VR metadata injection and export guidance).
Use this export checklist:
| Export task | Why it matters |
|---|---|
| Render at maximum resolution | VR loses clarity fast when compressed too hard |
| Choose H.264 or H.265 based on delivery needs | Both are viable, with H.265 often helping efficiency |
| Inject 360 metadata | Platforms need it to identify spherical playback |
| Test the file before publishing widely | A correct render can still fail in platform handling |
Export is not a clerical step. In VR, export determines whether the audience sees an immersive scene or a broken file.
Troubleshooting Common VR Video Problems
Most first-time VR problems fall into three buckets. Viewer discomfort, broken immersion, and playback issues.
If viewers feel uneasy, look at camera movement first. Keep motion slow, deliberate, and motivated. If a shot doesn't need movement, lock it off. Quick pans, unstable walking shots, and frequent cuts usually create discomfort faster than beginners expect.
If immersion breaks, inspect your seams and staging. Objects crossing stitch boundaries can look strange. So can subjects standing too close to the camera. Give the viewer breathing room, and review the full sphere instead of judging only the forward view.
Playback problems usually come from mismatch, not from one “bad” setting. Meta's technical guidance points to a real trade-off between resolution, field of view, and performance. It notes that cropped VR video can deliver a full 180-degree horizontal field of view at 5K and 60 fps by reducing the vertical view to around 100 degrees, while also emphasizing compositor-layer display, correct refresh-rate selection, and tight audio-video sync for better playback quality (Meta's technical guidance on VR video playback trade-offs). In plain terms, don't just push for the biggest file. Optimize for the headset and viewing format you plan to use.
If you're building a product, a brand, or a content engine as a solo founder, production is only half the battle. You also need creatives and launch plans that turn attention into sales. Social Loop AI helps first-time ecommerce owners turn a product URL into a practical Meta ads plan and ready-to-run creative angles, so you can move from making content to launching campaigns without hiring an agency.